OpenWrt Practice: WLAN access point commissioning

This article is about WLAN: everywhere in the house: on every floor, specifically about the commissioning of WLAN access points with OpenWrt as firmware. I have chosen the ZyXEL NWA50AX as the hardware for the access points: Equipped with 2 CPU cores, 128 MB flash and 256 MB RAM, the NWA50AX supports WiFi 6 (802.11ax) and can be powered with the supplied power supply unit or optionally via PoE. The ZyXEL NWA50AX is one of several available devices on which OpenWrt can be installed, see: OpenWrt hardware recommendation - available devices 2026.
For maximum speed and stability, I connect the access points directly to the main router via LAN cable. In addition to regularly updated firmware versions, OpenWrt also makes it possible to combine different devices from different manufacturers to create a WLAN mobility domain. A shared mobility domain enables the end devices to switch from one WLAN reception zone to another without any noticeable interruption.
Prerequisite: existing Internet router; goal: WLAN via additional access points
The Internet, regardless of the line technology or medium, is usually provided by the various operators in the form of a router. Although the router typically has an integrated WLAN, this is not always sufficient to cover all areas of the apartment or house. The aim of this article is to set up additional access points to improve WLAN coverage. The access points are connected to an existing switch or router with Internet access.
I would currently recommend a ZyXEL NWA50AX as an additional access point.

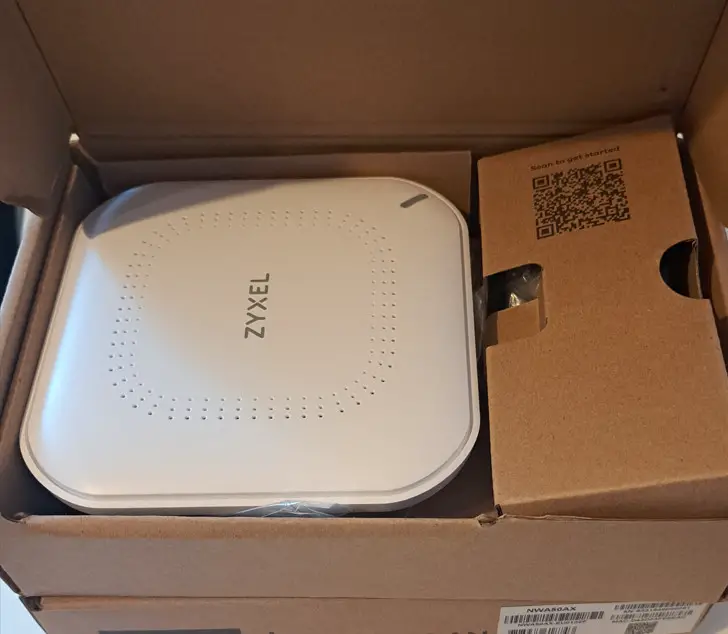
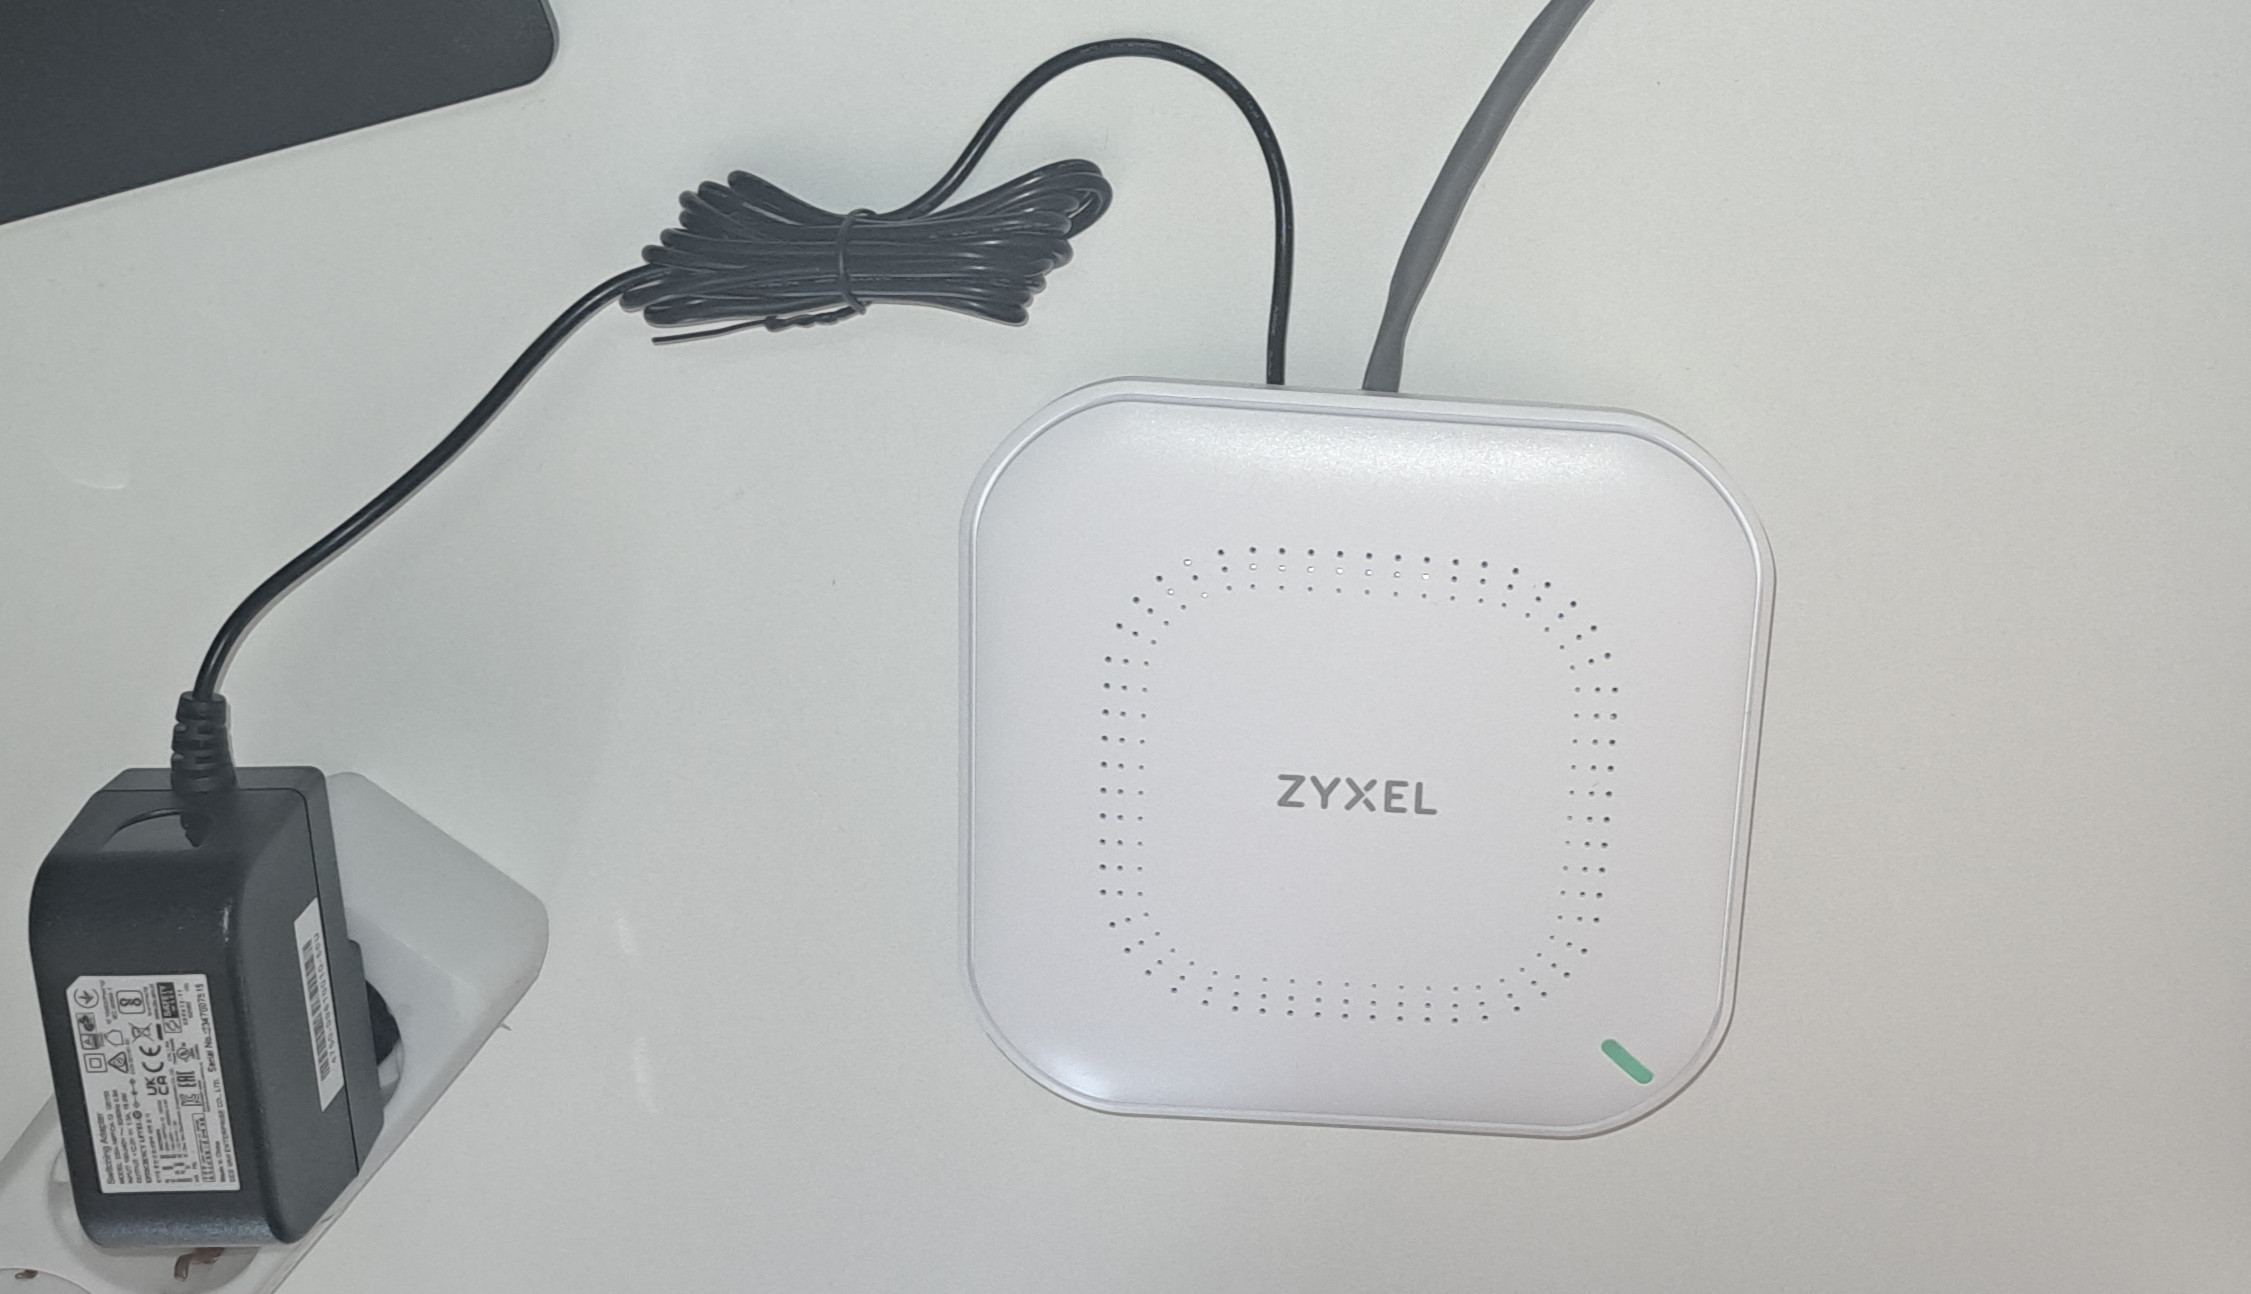
Unpacking: ZyXEL NWA50AX

First, the access point should be connected to the existing router using a network cable:

If it also receives some power via the supplied network cable, the access point should report to the existing router.
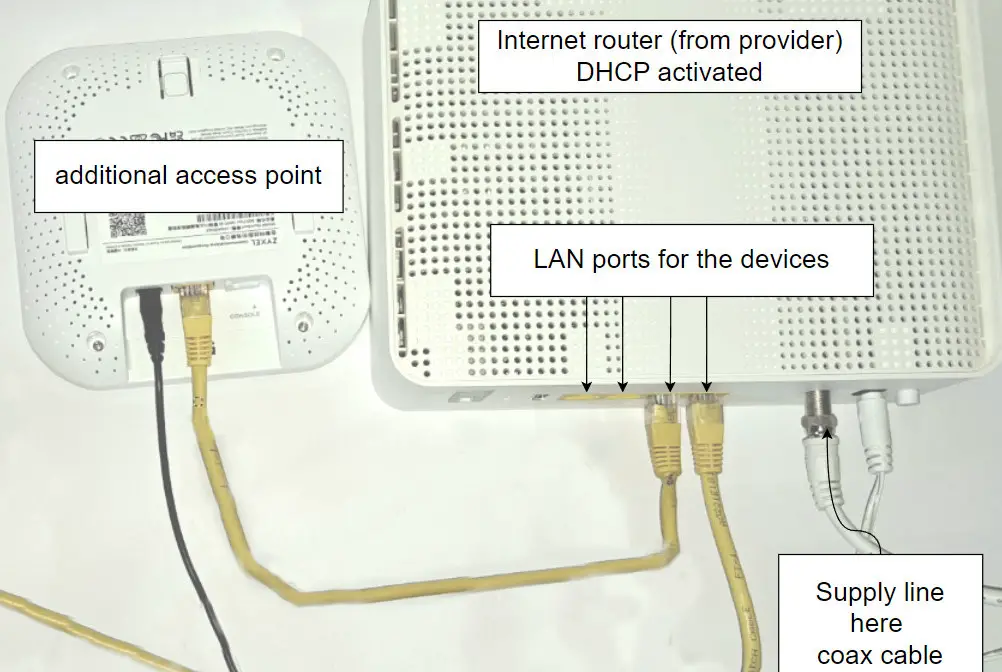
As the NWA50AX would also work via PoE, a switch with PoE or a PoE injector could be used as an alternative: The network cable alone would then be sufficient for the access point.
Preparation: Customized firmware download
For the flashing process, the firmware can be obtained from the OpenWrt website: firmware-selector.openwrt.org/?version=25.12.2&target=ramips%2Fmt7621&id=zyxel_nwa50ax. Attention: check the device again: the NWA50AX is available in 2 different versions:

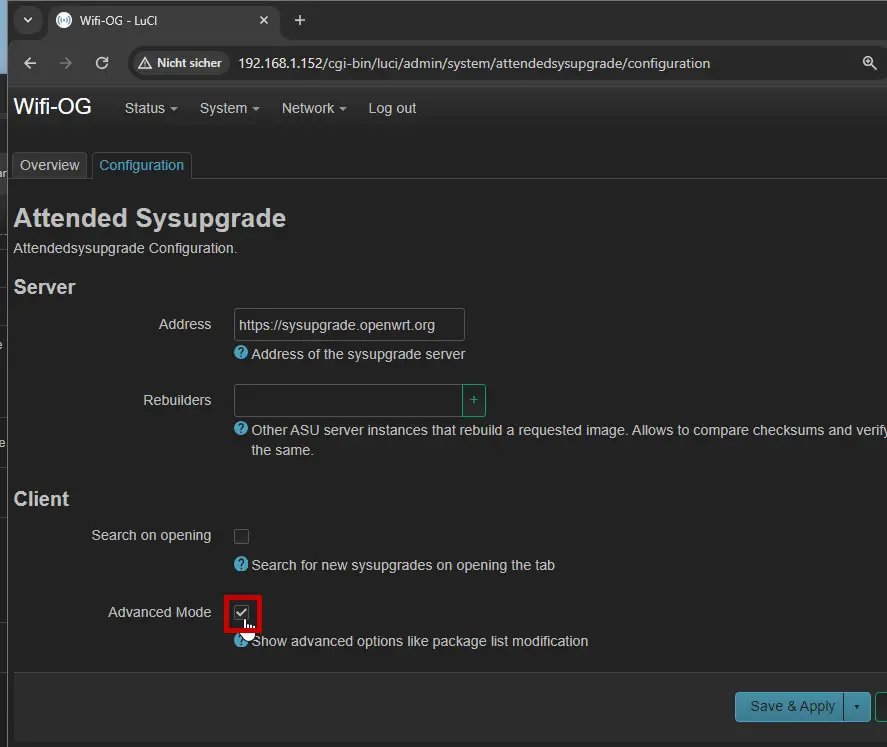
It is best to select the device and the latest available release and start the download using "FACTORY". Before downloading, I recommend adapting the installed packages for an access point right here: As an example, the client steering -Deamon "Usteer" and for an easier upgrade AttendedSysupgrade should be added.
.... luci-app-usteer luci-app-attendedsysupgradeBeim Einsatz als reiner Access-Point können zudem die Pakete: dnsmasq, firewall4, odhcp6c und odhcpd-ipv6only entfernt werden.

Add software packages later via the "Software" menu item: Not recommended for commissioning!
Software packages that are not yet integrated in the flash image can also be added later for devices with sufficient memory via the web interface: "Software". For devices with little memory, such as the TPLink RE650, the full version of wpad can only be installed via a flash process.
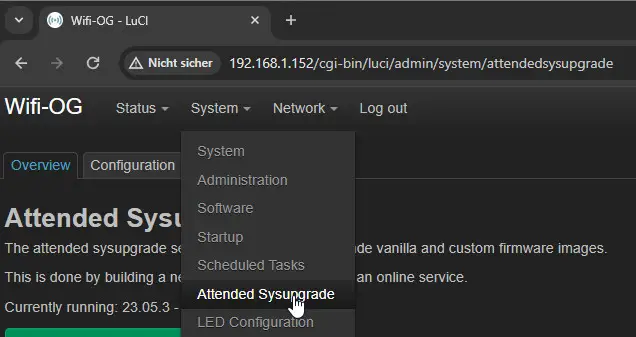
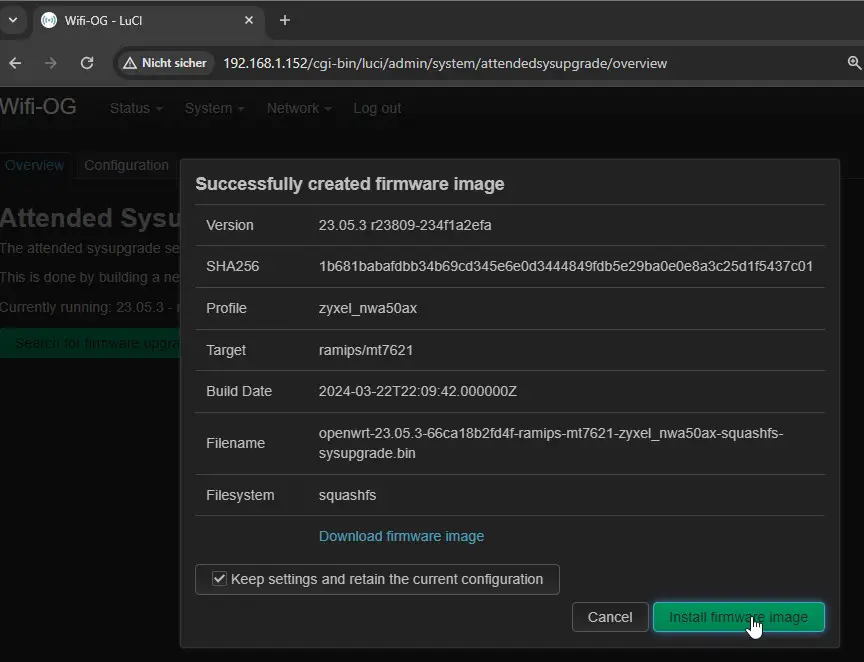
Packages that were nevertheless added via the Software menu item can be integrated into the flash memory via a later sysupgrade, the easiest way to do this is via the package: "Attended Sysupgrade", see: OpenWrt Upgrade simply: Keep software and settings.
Flash firmware
If the access point is connected to the existing router, it assigns an IP address via the integrated DHCP server. The easiest way to read out the IP address is from the management interface of the existing router. The existing router can be determined in Windows, for example, using the "ipconfig" command in the command prompt or in the terminal. The router IP address is usually hidden behind the standard gateway: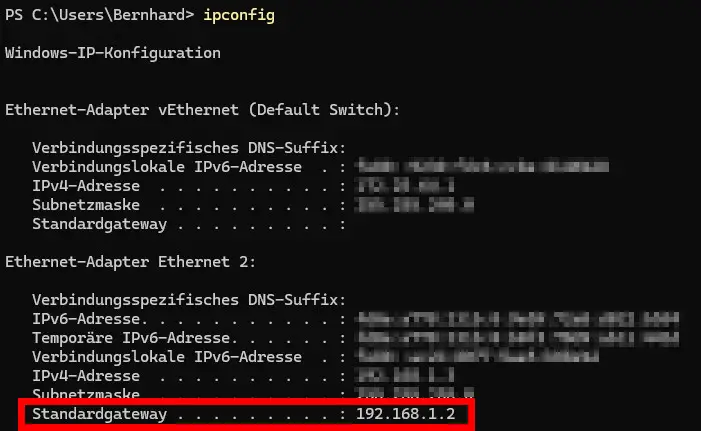
Entered in the browser, here http://192.168.1.2, this calls up the router's administration interface. As an example, an existing router with OpenWrt as firmware shows all active DHCP leases of the connected devices on their overview page: 
The router with active DHCP does not have to be an OpenWrt device; the Internet provider's router could also be used here: This should also list the IP addresses of the connected devices in its web interface.
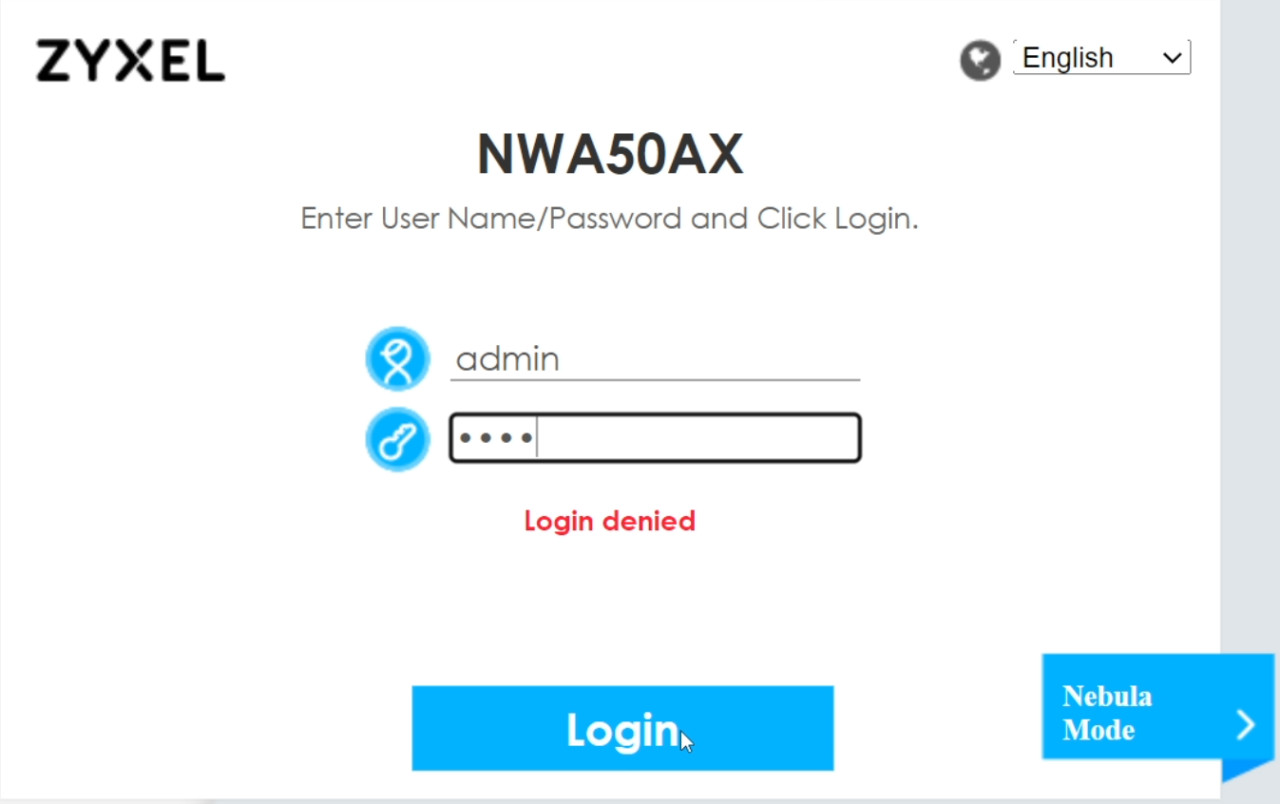
When entering the IP address, here "http://192.168.1.139" or, depending on the router, possibly also the name "http://NWA50AX" in the browser, the administration interface of the original firmware of the access point starts:

The default user name of the NWA50AX is "admin" and the password is "1234"
Since we will overwrite the settings later anyway, the following 3 steps of the Setup Wizard can simply be confirmed with "Next":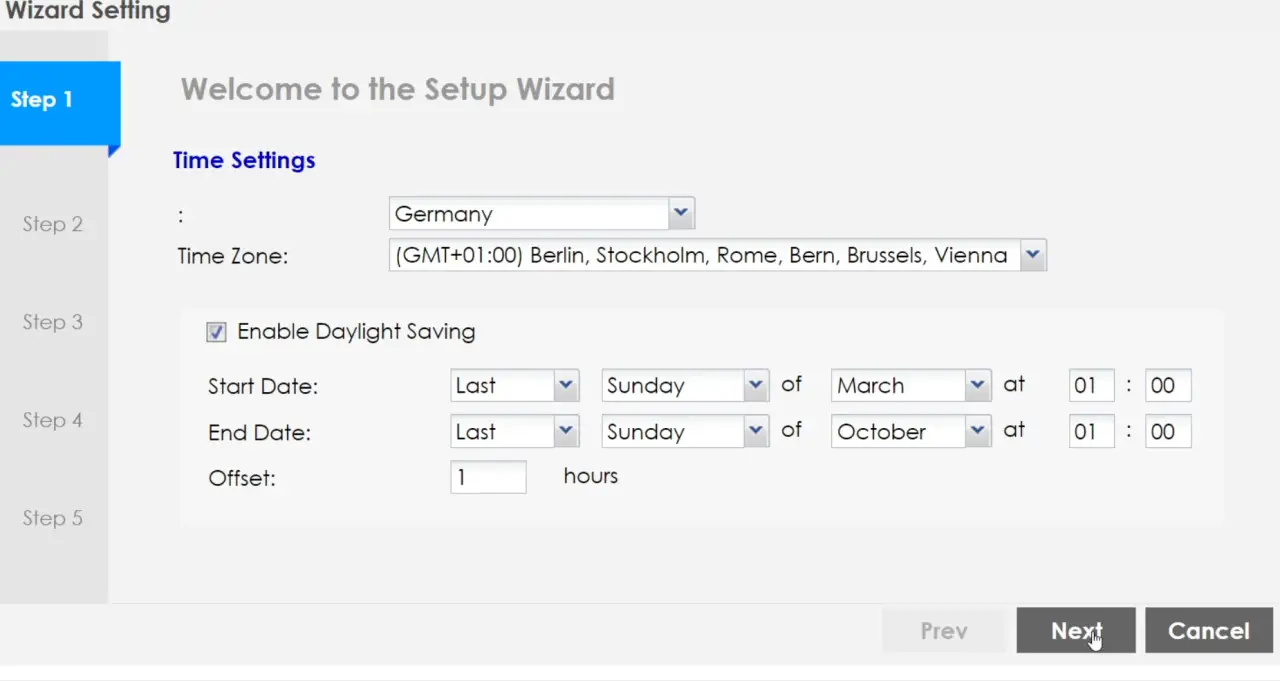
Point4: "Default SSID needs to be changed": create any WLAN identifier. (this will be changed again after installing OpenWrt)

The firmware is loaded using "Maintenace" and "Browse":
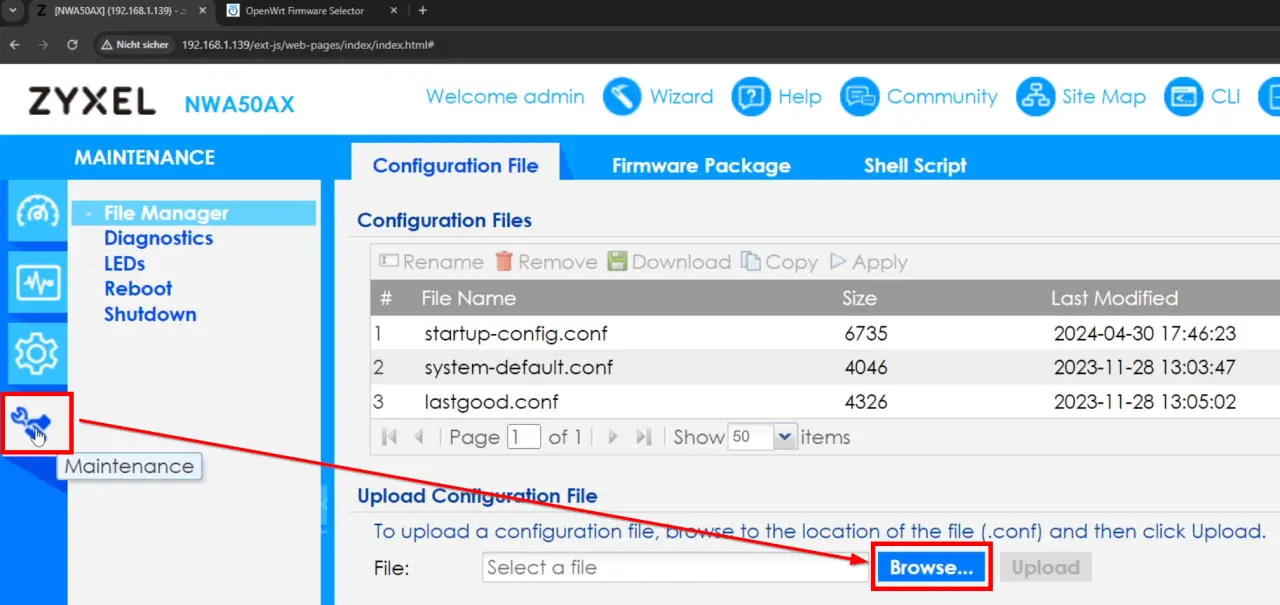
Then click on "Upload"
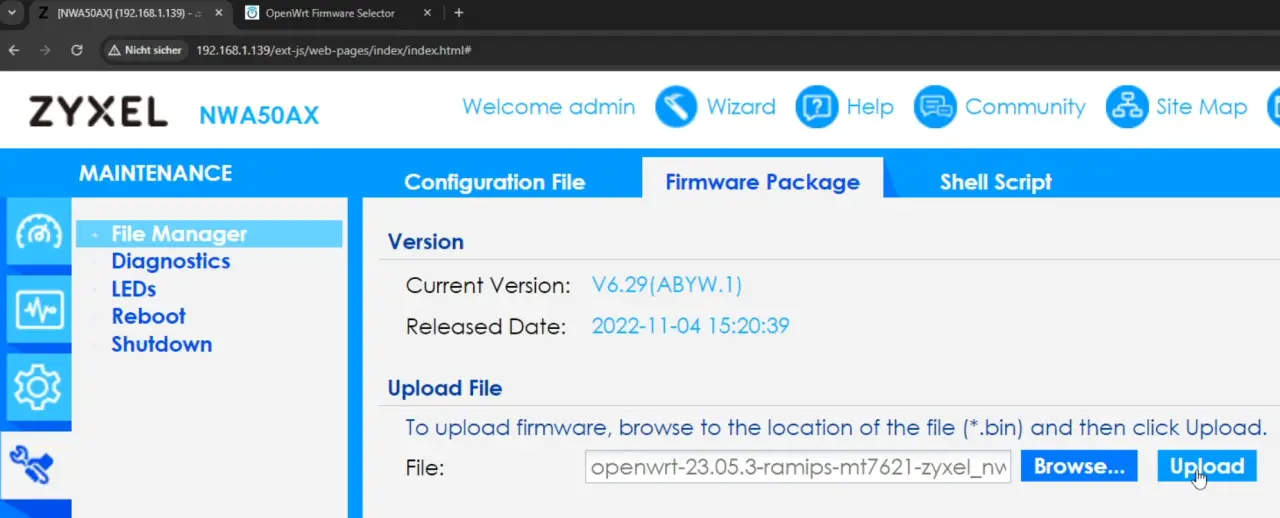
At this point, a little patience is required: After approx. 3 minutes, the router first changes from a slow orange flashing to a hectic red flashing and finally to "green"


The router then restarts: after a slow green flash, it lights up green again continuously.
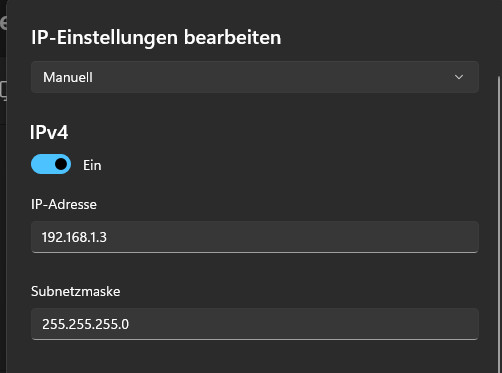
From now on, the access point can be reached at the OpenWrt standard IP address 192.168.1.1. If the main router happens to have the IP address 192.168.1.1 or an IP address outside 192.168.1.x, the access point can be disconnected from the router at this point and connected directly to a PC or laptop. The PC then requires a manual IP address in the subnet 192.168.1.x to access http://192.168.1.1: here as an example for Windows 11:
Settings: 

If a PC with an IP address between: 192.168.1.2 - 254 is available, we can continue with the initial setup:
Initial setup of the access point (OpenWrt)
one after the other: 1) Log in: Username: root, password empty: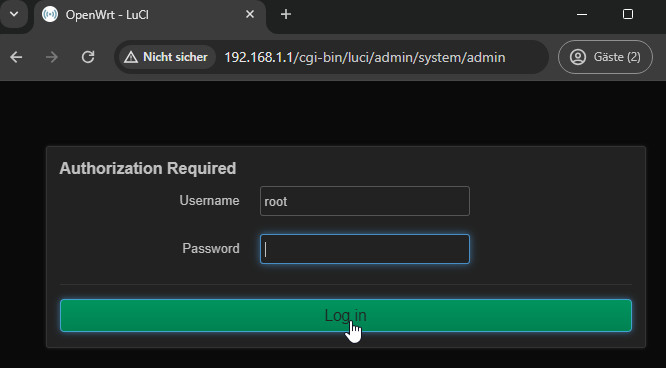
Of course, the empty password should be replaced with a correct password as soon as possible:
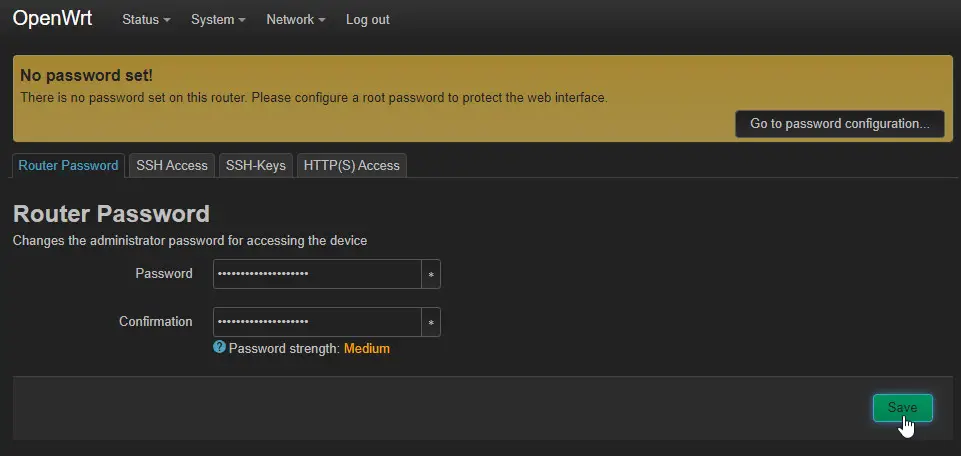
Configuration as access point:
For configuration as an access point, this does not necessarily require a static IP address, so the LAN interface can be set to "DHCP", whereby the access point receives an IP address from the main router.

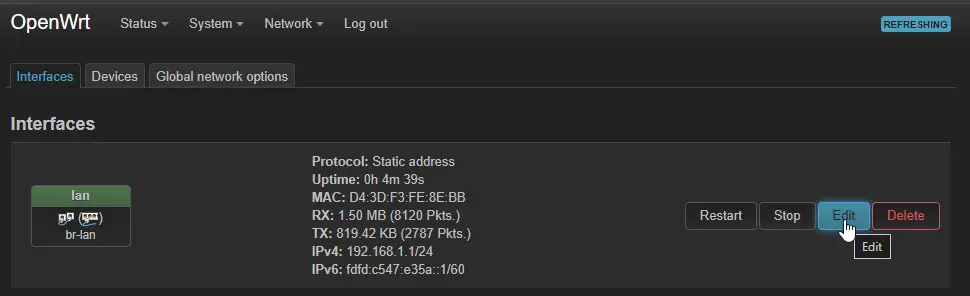

It is also important to deactivate the DHCP server service at this point, as otherwise the access point will assign IP addresses to the connected devices and these may conflict with the addresses of the router.

For security reasons, I also deactivate the IPv6 DHCP server:


Since the access point acts as a DHCP client, it obtains the IP address from the main router.
Another quick look at the main router reveals the IP address of the access point that has just been configured: As a rule, the router assigns the same IP address as before the flash process: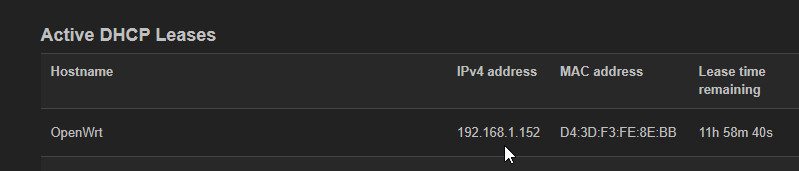
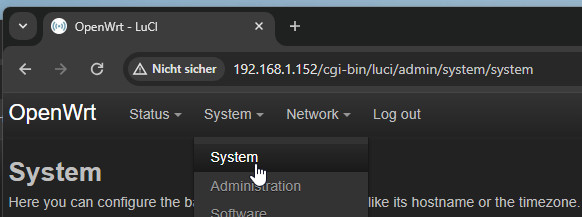
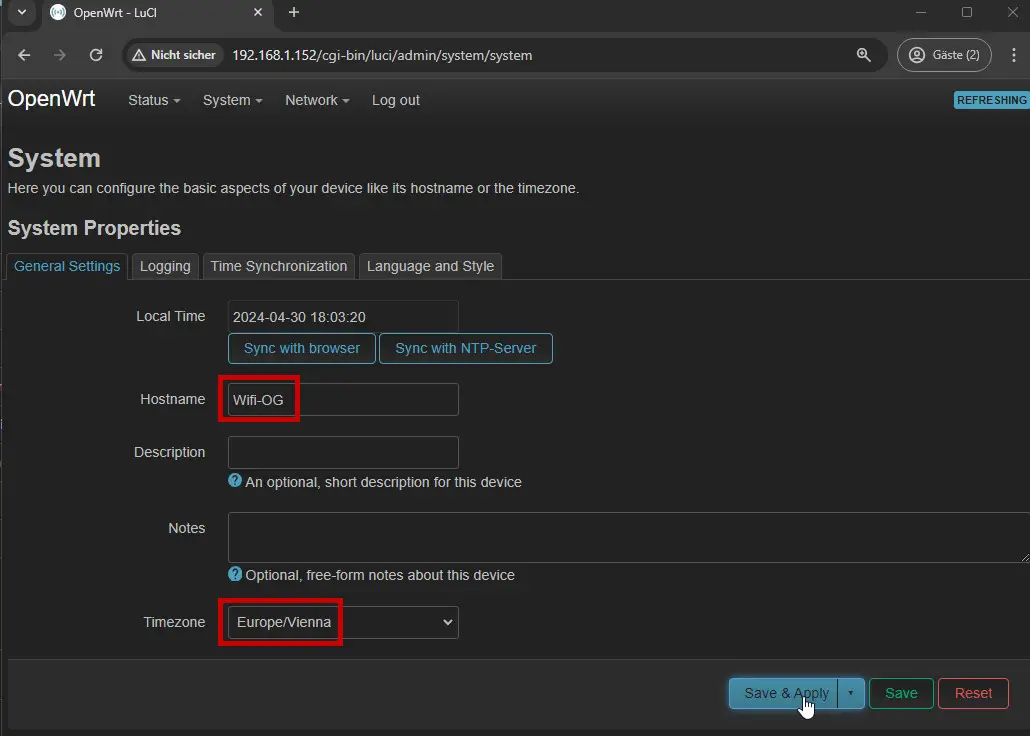
To give the access point a unique name, the host name should be adjusted in the system settings:
NTP
Nachdem die Uhrzeit der Access-Points in der Vergangenheit nicht immer synchron war, habe ich einen täglichen Cron-Job eingerichtet, damit die Zeit täglich aktiv korrigiert wird:


30 03 * * * ntpd -q -p 0.it.pool.ntp.orgPure access points: deactivate unneeded services:
The following 3 services are not required for a pure access point and can therefore be disabled and stopped: Firewall, udhcpd, dnsmasq.
Alternatively, these packages can be removed when creating the flash image, see: Customizing the firmware

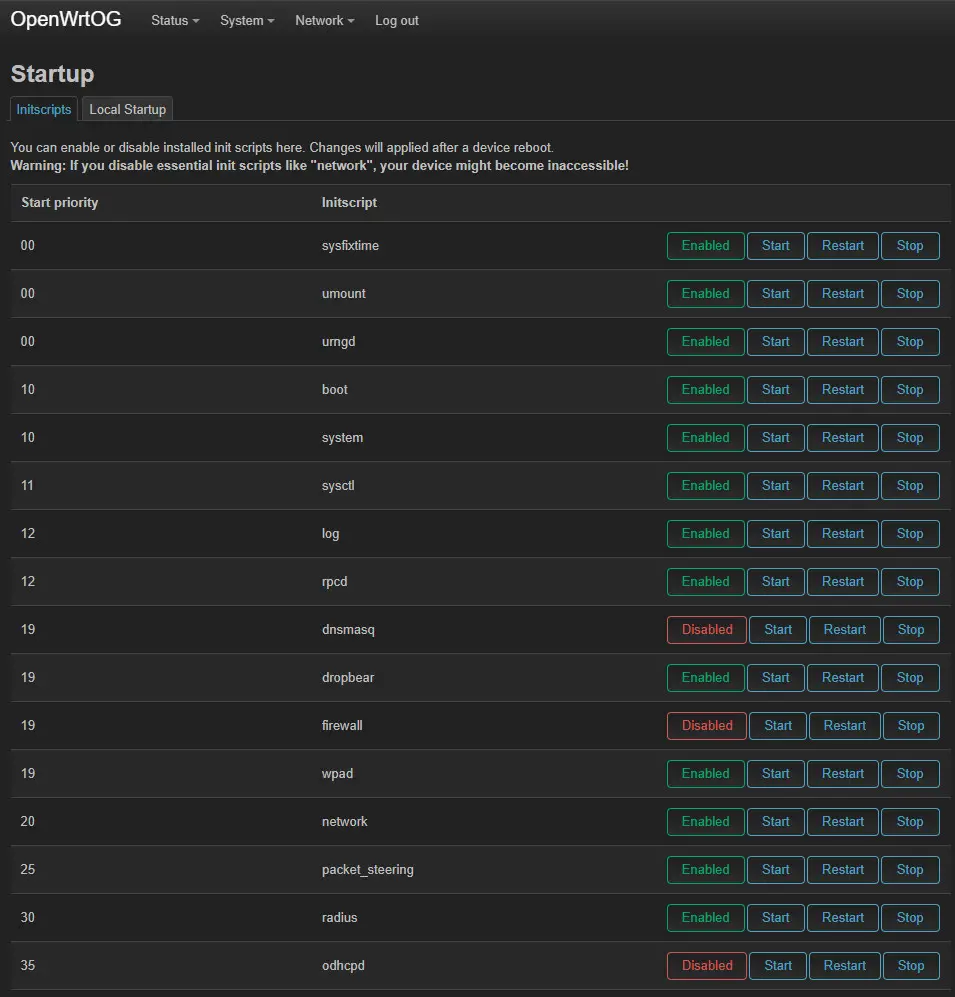
To prevent the services from being reactivated during a later firmware update, the official Openwrt site recommends a few lines in the /etc/rc.local file: in the web interface: System / Startup

additional lines:
# these services do not run on dumb APs
for i in firewall dnsmasq odhcpd; do
  if /etc/init.d/"$i" enabled; then
    /etc/init.d/"$i" disable
    /etc/init.d/"$i" stop
  fi
done

rm /usr/sbin/wpa_supplicant
(Source: openwrt.org/docs/guide-user/network/wifi/wifiextenders/bridgedap)
Network / DHCP and DNS: delete

When commissioning several access points of the same type, the following settings can be made on one AP and transferred to the other APs using Backup / Restore:
Commissioning - WLAN settings
The following settings are also described in the article:"Uninterrupted WLAN: Roaming (Fast Transition)" and can also be set via terminal and SSH as an alternative to the web interface. The bash commands for the WLAN settings presented here can also be easily set via the terminal and our Online Helper which simplifies the Command generation: see: OpenWRT WLAN FT configuration - Generate online

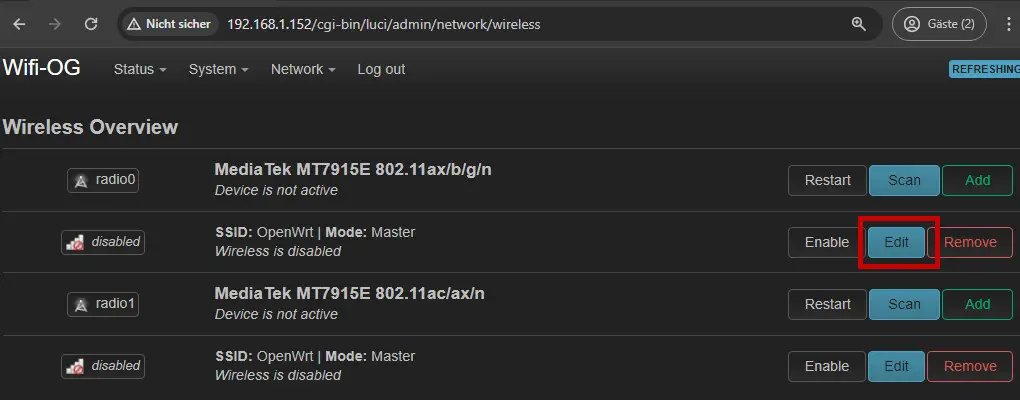
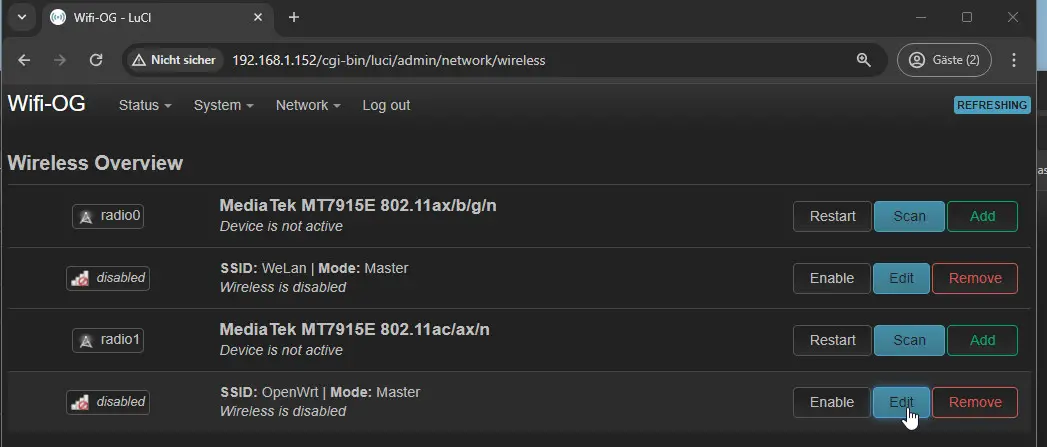
First, the Wi-Fi is set starting with one of the existing Wi-Fi networks:
I adjusted the country code in the Advanced Settings, as one of my access points could not activate the interfaces without the setting:

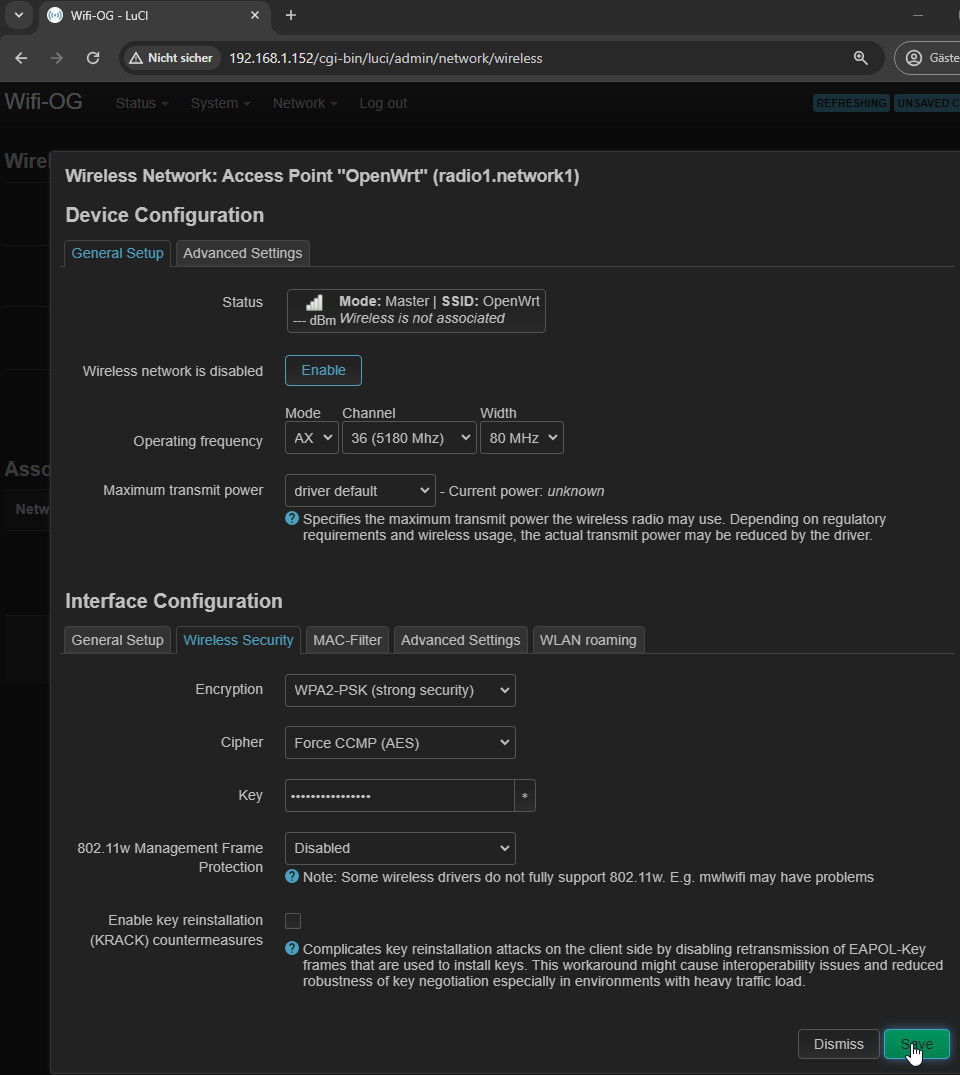
The name of the WLAN/identifier is set under "ESSID": here "WeLAN":
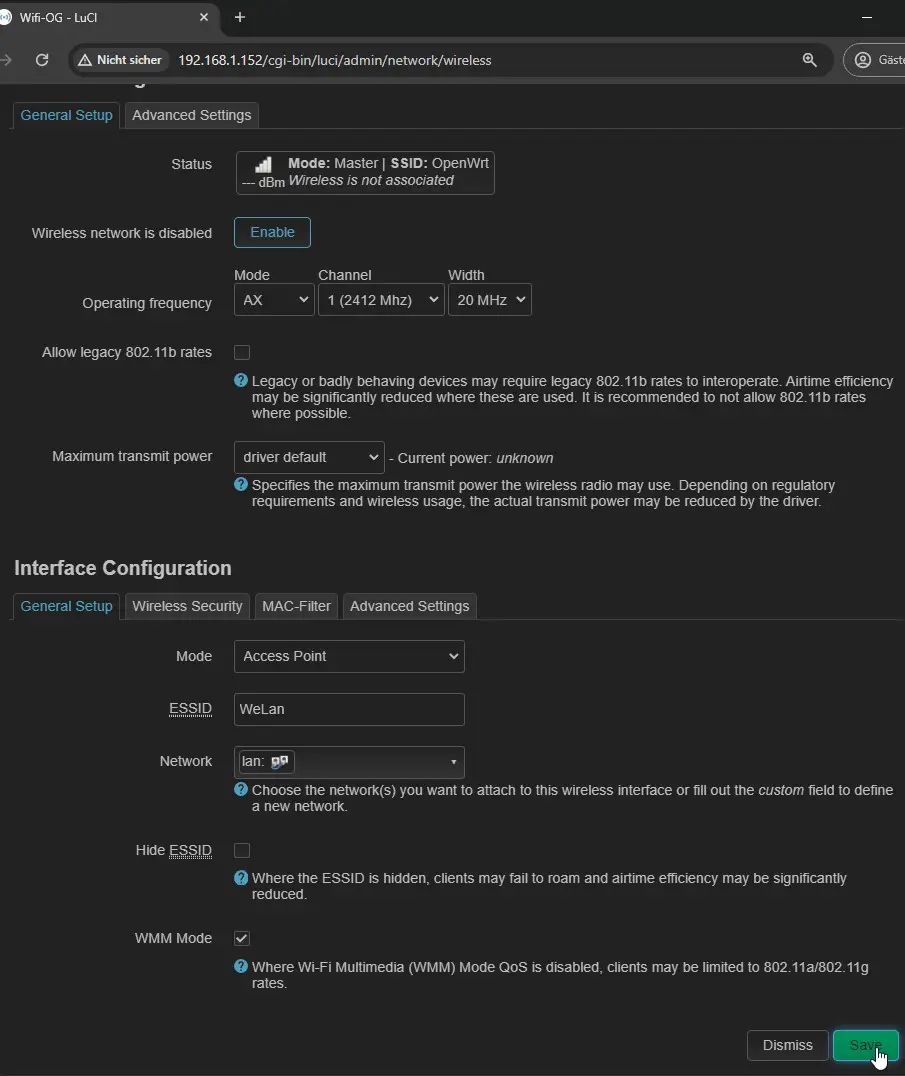
When using several access points, it makes sense to use different frequencies, see: WiFi in the area: Display and find the best WiFi channel.
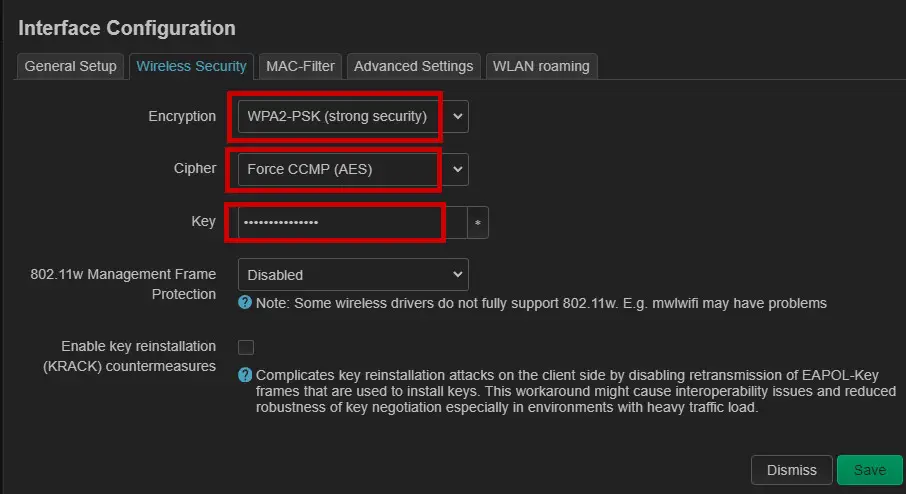
The password for the WLAN is then set under "Wireless Security", under "Key":
The DTIM interval can be tuned in the Advanced tab. At this point, I use a DTIM interval of 3 for the 5 GHz WLAN and 1 for the 2.4 GHz WLAN:

Finally, the WLAN roaming settings: so that the devices can form a WLAN network with each other:

For 802.11r Fast Transition, I use a unique "Mobility Domain". The setting Reassociation Deadline: 20000 was able to eliminate the constant reconnection of certain devices.
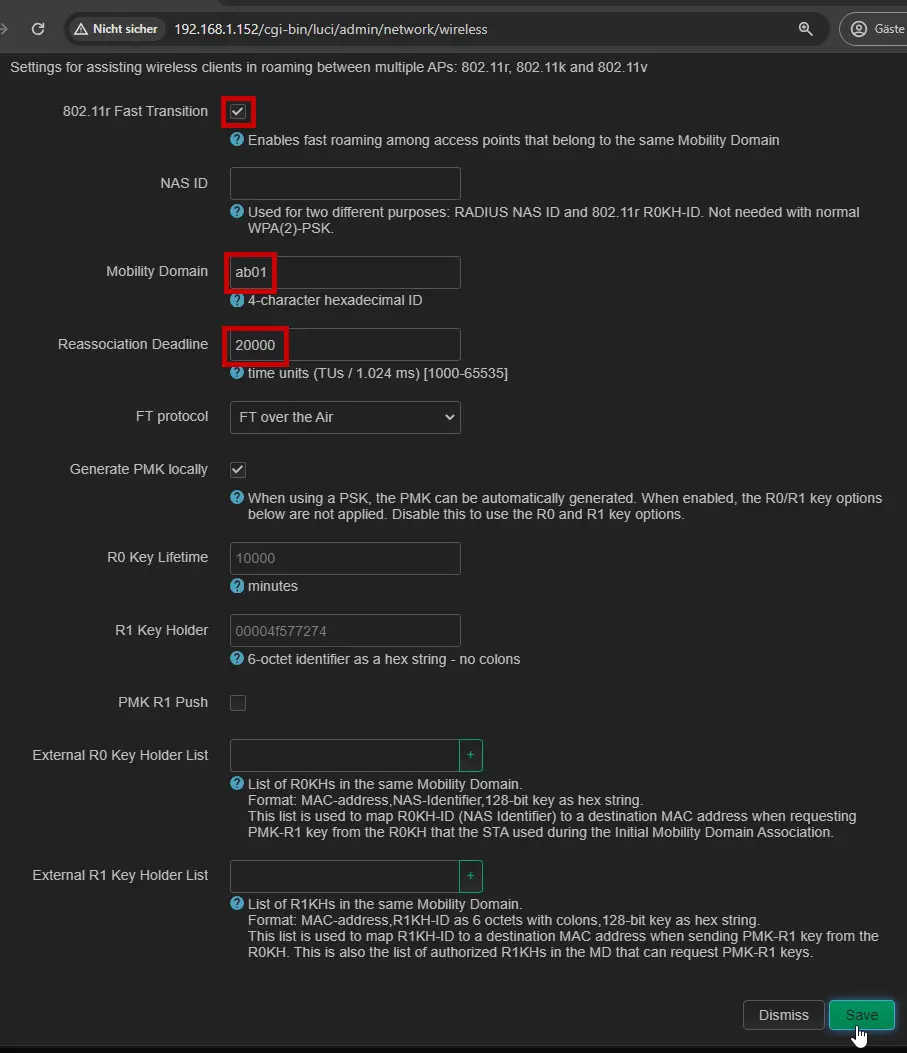
If Wpad Full has been installed and the router restarted, these additional options will appear and the roaming behavior can be further optimized, see: Uninterrupted WLAN: Roaming (Fast Transition)
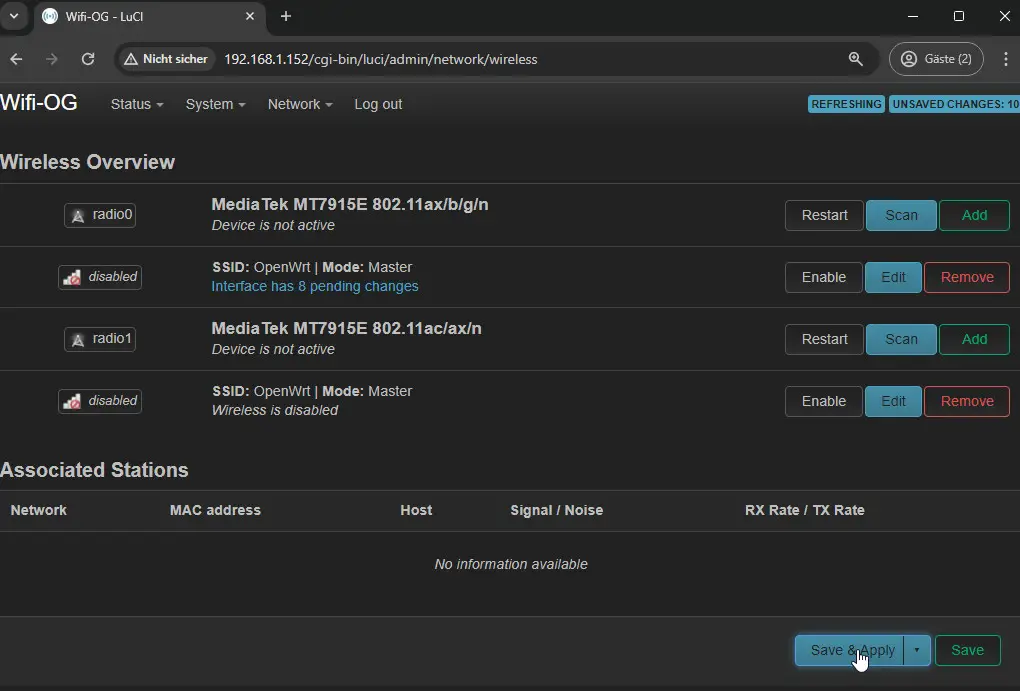
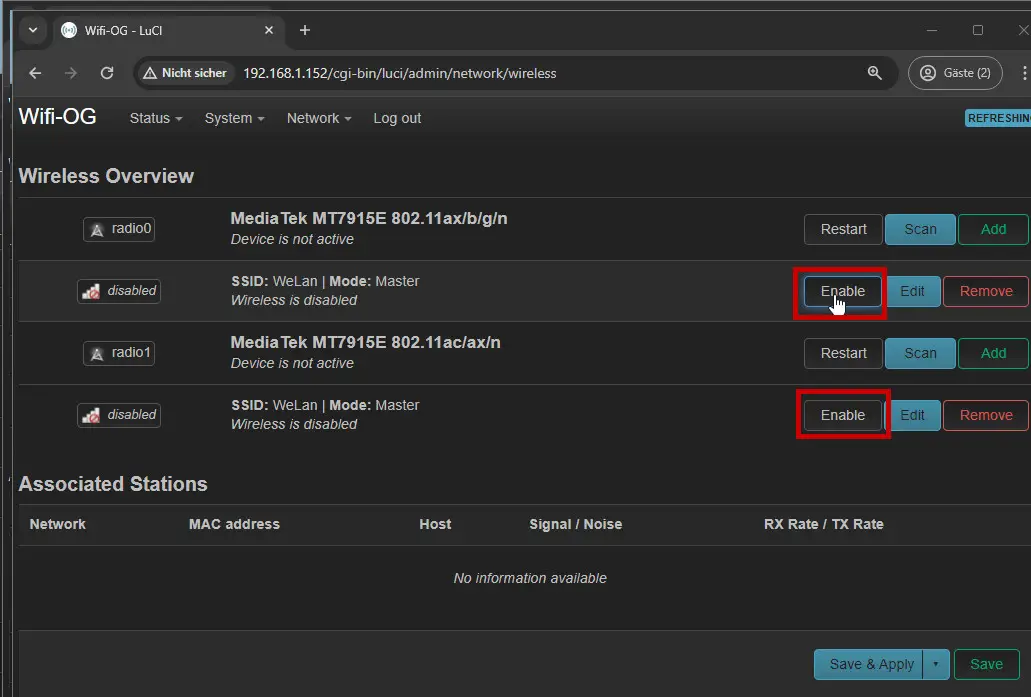
To ensure that the access point offers both 2.4GHz and 5GHz, all settings previously made for the 2.4GHz should also be set on the 5Ghz WLAN:
WLAN roaming settings are not listed separately here as screenshots; these should be set immediately for the first WLAN network.
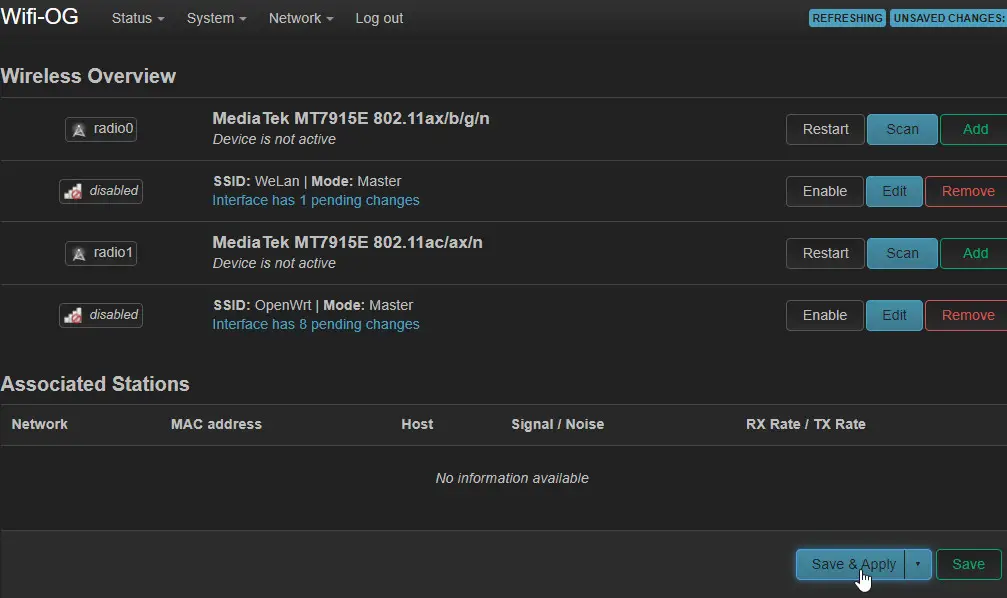
If all WLAN interfaces have been set the same, they must be switched on at the end: "Enable":
Usteer settings
In order for the access points to actively intervene in the WLAN roaming, the previously installed roaming deamon should be adjusted slightly: Here are the settings I use for my setup:


see also: Uninterrupted WLAN: Roaming (Fast Transition)
Backup
Finally, I usually make a backup of the settings so that the device can be restored in the event of a fault. Alternatively, the backup can be imported to another access point so that it can be put into operation more quickly.


Conclusion
I have been using OpenWrt as firmware for my access points for several years now and have constantly optimized the settings and incorporated new available options, especially for the roaming functionality. The settings correspond to my current setup and I will adjust this or the associated articles if necessary, if further optimizations arise, such as the removal of Usteer, see also: Uninterrupted WLAN: Roaming (Fast Transition)
 ({{pro_count}})
{{percentage}} % positive
 ({{con_count}})