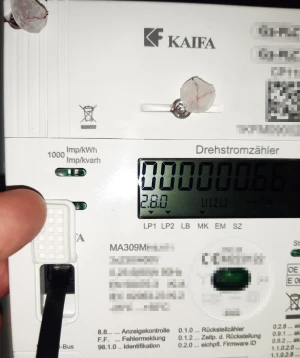
Read out smart meter of the network operator KAIFA MA309M
Knowledge of current consumption data helps to optimize electricity consumption in a meaningful way. For this purpose, an additional smart meter can be installed or, even better, the smart meter of the network operator can be read out. As an example, the smart meter of my network operator, Salzburg AG, can be queried via the M-Bus customer interface and the data can thus be used in other systems. The values read out include the energy consumption and, if a PV system is used, the feed-in power, as well as the voltage and current of each individual phase, all live, at 5-second intervals. All that is needed to read out the Kaifa MA309M is an MBUS-to-UART board and an ESP32 microcontroller. I programmed the microcontroller in ESP-Home using an open source project from Github: https://github.com/DomiStyle/esphome-dlms-meter. After uploading the project to the ESP32, when connected to the smart meter, the ESP32 will deliver the data to the Home Assistant whereby these can be evaluated and used for certain automations.

A prerequisite for communication with the smart meter is the activation of the customer interface in the web portal of the network operator:
Enable customer interface
To activate the customer interface, my network operator offers a menu item in its portal for its release:


The key thus provided can be used to read out the data via M-Bus using an RJ12 connector.
Hardware required
The following hardware is required for this purpose:
- RJ11 or RJ12 cable
- ESP32:
- m-bus-slave-click TSS721A (MBus -to UART-Board) de.rs-online.com/web/p/entwicklungstools-kommunikation-und-drahtlos/2167484
- 5V power supply for the ESP32 or charging cable
- cable:


required software
As mentioned elsewhere on this page, I use Docker containers exclusively for my smart home setup:
- Home Assistant
- ESP Home (connection to Home Assistant via API key).
- Alternative to ESP Home API: MQTT - Broker and Home Assistant MQTT - Integration
Wiring
I connected the TSS721A to the ESP32 as follows:
Power supply via the PINs:
- 5V and
- GND
from the ESP32 to the M-Bus Board:
- ESP32-Pin35 <-> M-Bus Board Pin TX
- ESP32 pin16 <-> M-Bus Board Pin RX
- ESP32-GND <-> M-Bus Board GND
- ESP32-3V3 <-> M-Bus Board 3V3
From M-Bus Board to RJ12 connector
- M-Bus Board MBUS1 to RJ12-3
- M-Bus Board MBUS2 to RJ12-4

From the TSS721A to the RJ-12 connector of the Smart Meter:
Here again a single photo of the two boards:


ESPHome project
The ESPHome project DomiStyle/esphome-dlms-meter was implemented via a "custom_component", which no longer works with the current ESPHome version: "custom_component" has been removed. With the current ESP-Home version, only one "external_component" can be used. In contrast to the implementation with "custom_components", the dependencies can be downloaded directly from Github via "external_component", which means that commissioning is limited to the YAML configuration and is therefore much easier. An adjustment to "external_component" is currently only available in a pull request on Github.
To ensure that Wifi and the API key of the ESP-Home project are created correctly, the ESP32 should first be added as a new device in ESP-Home:

The ESP32 config can then be adjusted as follows:
esphome:
  name: smartmeter

external_components:
  - source: github://pr#8009
    components: [ dlms_meter ]

esp32:
  board: esp32dev

# Enable logging
logger:

# Enable Home Assistant API
api:
  encryption:
    key: "??"

ota:
  platform: esphome
  password: "??"

wifi:
  ssid: !secret wifi_ssid
  password: !secret wifi_password

  # Enable fallback hotspot (captive portal) in case wifi connection fails
  ap:
    ssid: "Smartmeter Fallback Hotspot"
    password: "??"

captive_portal:

uart:
  tx_pin: GPIO16
  rx_pin: GPIO35
  baud_rate: 2400
  rx_buffer_size: 2048
  id: mbus


dlms_meter:
  decryption_key: "99999999999912312312312312312345"

sensor:
  - platform: dlms_meter
    voltage_l1:
      name: "meter01_voltage_l1"
      unit_of_measurement: V
      accuracy_decimals: 1
      device_class: "voltage"
      state_class: "measurement"
    voltage_l2:
      name: "meter01_voltage_l2"
      unit_of_measurement: V
      accuracy_decimals: 1
      device_class: "voltage"
      state_class: "measurement"
    voltage_l3:
      name: "meter01_voltage_l3"
      unit_of_measurement: V
      accuracy_decimals: 1
      device_class: "voltage"
      state_class: "measurement"
    current_l1:
      name: "meter01_current_l1"
      unit_of_measurement: A
      accuracy_decimals: 2
      device_class: "current"
      state_class: "measurement"
    current_l2:
      name: "meter01_current_l2"
      unit_of_measurement: A
      accuracy_decimals: 2
      device_class: "current"
      state_class: "measurement"
    current_l3:
      name: "meter01_current_l3"
      unit_of_measurement: A
      accuracy_decimals: 2
      device_class: "current"
      state_class: "measurement"
    active_power_plus:
      name: "meter01_active_power_plus"
      unit_of_measurement: W
      accuracy_decimals: 0
      device_class: "power"
      state_class: "measurement"
    active_power_minus:
      name: "meter01_active_power_minus"
      unit_of_measurement: W
      accuracy_decimals: 0
      device_class: "power"
      state_class: "measurement"
    active_energy_plus:
      name: "meter01_active_energy_plus"
      unit_of_measurement: Wh
      accuracy_decimals: 0
      device_class: "energy"
      state_class: "total_increasing"
    active_energy_minus:
      name: "meter01_active_energy_minus"
      unit_of_measurement: Wh
      accuracy_decimals: 0
      device_class: "energy"
      state_class: "total_increasing"
    reactive_energy_plus:
      name: "meter01_reactive_energy_plus"
      unit_of_measurement: Wh
      accuracy_decimals: 0
      device_class: "energy"
      state_class: "total_increasing"
    reactive_energy_minus:
      name: "meter01_reactive_energy_minus"
      unit_of_measurement: Wh
      accuracy_decimals: 0
      device_class: "energy"
      state_class: "total_increasing"

text_sensor:
  - platform: template
    id: meter01_timestamp
    name: meter01_timestamp

mqtt:
  broker: "192.168.1.5"
  port: "1883"
  username: "mqtt"
  password: "??"
  id: mqtt_broker
  discovery: true
The decryption_key must be filled with the previously created key of the customer interface (network operator portal). The ESP32 can be connected to Home Assistant via the ESP-Home and its API key - the "mqtt:" area is then not necessary. If you prefer MQTT as the protocol for the connection, you can alternatively adapt the data for the MQTT broker. (IP, username and password).
Wrong values in Home Assistant
At the beginning, I used the pin 36 recommended in the project for the connection of the TSS721A, which generated completely wrong values every now and then:

First I corrected the wrong values manually, see also: www.libe.net/home-assistant-statistic.
The incorrect values can be avoided by filter in ESP-Home, see the following example:
...
  - platform: template
    id: meter01_active_power_plus
    name: meter01_active_power_plus
    unit_of_measurement: W
    accuracy_decimals: 0
    device_class: "power"
    state_class: "measurement"
    filters:
      - lambda: |-
          float MAX_DIFFERENCE = 1500.0;
          static float last_value_t = NAN;
          static int count_missed_t = 0;
          if (count_missed_t == 5) last_value_t = x;
          if (isnan(last_value_t) || std::abs(x - last_value_t) < MAX_DIFFERENCE) {
            count_missed_t = 0;
            return last_value_t = x;
          } else {
            count_missed_t += 1;
            ESP_LOGW("main", "Missed Data active_power_plus %d", count_missed_t);
            return last_value_t;
          }
But it is better if the incorrect values do not occur at all. In my case I could solve the problem by changing the RX pin from 36 to 35. A corresponding hint can also be found in the Github project: https://github.com/DomiStyle/esphome-dlms-meter/issues/16.
ESP-Home Update: MBUS: Frame too big for received data
With my first ESP-Home version 2022.11.3 I used as value for the uart - rx_buffer_size: 1024, which caused the following error after an ESP-Home update to 2023.4.3 when reading out the data:
[20:44:29][E][espdm:064]: MBUS: Frame too big for received data
[20:44:30][E][espdm:048]: MBUS: Start bytes do not match
[20:44:30][E][espdm:104]: DLMS: Unsupported system title length
After changing rx_buffer_size to 2048, I was able to use the ESP32 with the new ESP Home version:
uart:
  tx_pin: GPIO16
  rx_pin: GPIO35
  baud_rate: 2400
  rx_buffer_size: 2048
  id: mbus
see also: https://github.com/DomiStyle/esphome-dlms-meter/issues/19
Conclusion
If the grid operator allows a readout of its smart meter, it provides the exact purchase and feed-in power. In addition, the data can be used to control a smarthome solution such as Home Assistant. The exact feed-in value can be particularly interesting for operators of photovoltaic systems. It would be conceivable, for example, to react to the surplus of a PV system without having to query the inverter and without having to install an additional smart meter. As Example: Control heating with Home Assistant.
 ({{pro_count}})
{{percentage}} % positive
 ({{con_count}})